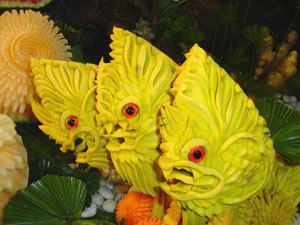
Pumpkin Carving with Chef Carl Jones
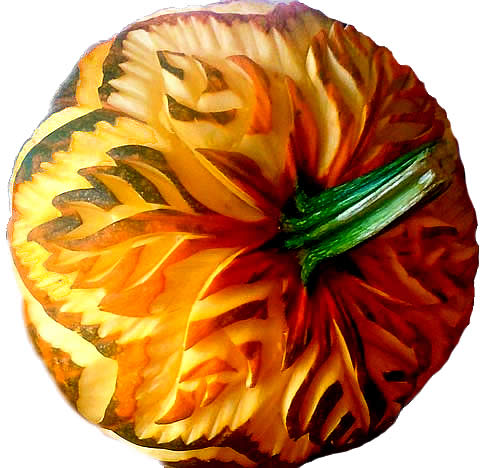
Chef Carl, a master fruit carver and chef, who regularly teaches the art of fruit carving. What started as a hobby to control stress has turned into a passion for this chef and businessman. Many people are surprised to learn that this artsy, happy, fruit carver is an entrepreneur who travels the U.S. consulting restaurants and catering businesses.
Carl also creates fabulous carved centerpieces for weddings, corporate events, museum exhibits and parties across the US. See his website for more details and class schedules.
Enjoy a few of Carl's latest pumpkin carvings which are in the artisitc style of Thai fruit carving.
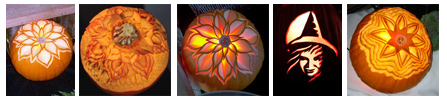
| Chef Carl's Gallery |

|

|

|

|

|

|
| Pumpkin Carving |
Step By Step Pumpkin Carving
Learn how to carve pumpkins step-by-step with a pattern.
- Sketch a design on tracing paper - think of it as a stencil so that all elements of the design are connected with no free standing shapes. Ideas for designs can include scenes, designs, words, flowers, suns, stars, insect and animals. Consider having designs that wrap all the way around the pumpkin.
- Cut a lid, making sure it is large enough for your hand to fit comfortably inside the pumpkin to clean it out. A notch cut into the lid will make it easier to find the correct way to replace it.
- Clean out the inside using a special pumpkin scoop with a flattened end or a kitchen spoon. Scrape the sides of the pumpkin flesh inside until the area that will be carved is reduced to about an inch think.
- Next transfer your design to the pumpkin by taping it to the outside and then use a pin to prick all along the lines of the pattern. Remove the paper pattern. The pin pricks become the guide for the carving.
- Using a tiny carving blade, connect the pin pricks, like connecting a dot-to-dot puzzle. It's important to keep the blade perpendicular to the pumpkin and saw up and down. Don't put your hand inside the pumpkin while you're sawing! Carve the smaller, more intricate areas of the design first, leaving the larger areas until last.
- To retain the carving as long as possible be sure to use firm produce which is not really ripe; spray it with original PAM cooking spray when the carving is complete. PAM will prevent carvings from drying out or turning cloudy when refrigerated. Cover with a wet paper towel and plastic wrap, a melon carving sprayed with PAM can be kept in the refrigerator about a week.
- To light the pumpkin, use up to 5 or 6 tea lights per pumpkin to really make it glow. Christmas bulbs can also be used to light a pumpkin - the blinking bulbs make the pumpkin seem alive!
Pumpkin carving Instructions inspired by David Rochelle, professional pumpkin carver, illustrator and author.
| Your Comments |